Because of its high contrast and unique dyes, Kodachrome presents a challenge to CCD type scanners. In addition, the design of the Nikon LS series scanners results in Kodachrome scans with a blue cast. In general you must modify the blue curve to get decent Kodachrome scans on the LS-2000. This is a simplified description of the steps for scanning Kodachrome.
Case I - Landscape
Step 1. Getting a preview scan
Reset to factory defaults, press focus, and preview.
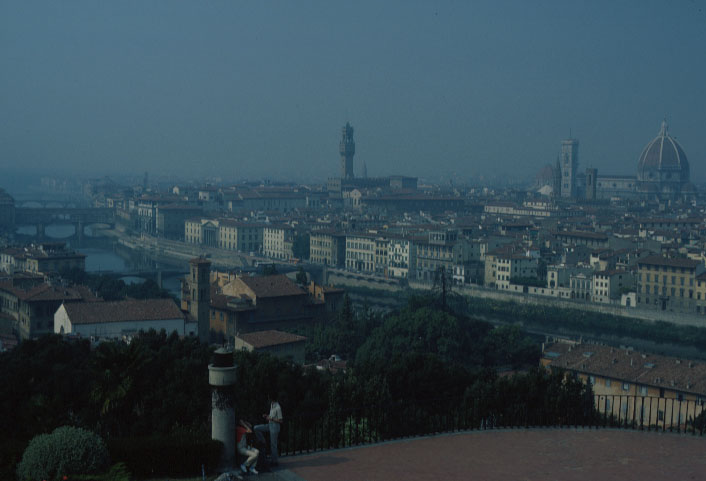
The initial scan is dark and too blue. The histogram of the preview image (below) shows that the image's pixel values are distributed over the entire tonal range that it uses, and since this is a landscape in which the entire frame is of interest, no contrast adjustments to any local areas should be performed.
For help with histograms and tone curves: Understanding and using histograms and tone curves
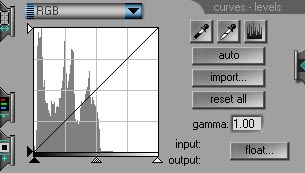 |
Comment: An initial histogram skewed to the left (too dark) is fairly typical for scanning Kodachrome on the LS-2000. In general, what you want is to have the left edge of the histogram abutting the left edge of the graph and the right edge of the histogram abutting the right edge of the graph. Why do you want to do this? The distance along the horizontal axis, from the left to right margins, represents the sensitivity range of the LS-2000, the scanner's D-Min to D-Max. The idea is that the optimal use of this fairly limited range is achieved by mapping the image exactly over the available range. Keep in mind that the ultimate output is a picture file of discrete (integer) values. If you end up with an image which uses only, say, 180 of the 256 (this is relative) available tonal values your image will be more prone to posterization when the image is subsequently manipulated in an image processing program such as Photoshop. That's the theory. In practice I try not to place the black and white points so close to extremes of the histogram. My rationale is that unless it's known that a real black or white is present in the image, it's more advantageous to have some leg- and head-room available for subsequent manipulation of the image. |
For the subsequent steps to the final scan for this image, I suggest considering one of 3 different alternatives, described in order of increasing effort and image quality:
2. Make the adjustments in Photoshop and re-scan in NikonScan
3. Push more light through the film by adjusting the master analog gain.
All images in this case are without sharpening.