Alternative 1 -- Scan Using NikonScan
This method generates the final scan entirely within NikonScan. The disadvantage is that NikonScan displays images differently than Photoshop. (I've never been able to get them to match.)
Step 2. Adjusting Tone
Prior to correcting any color casts, I first try to get a scan with acceptable tone.
 |
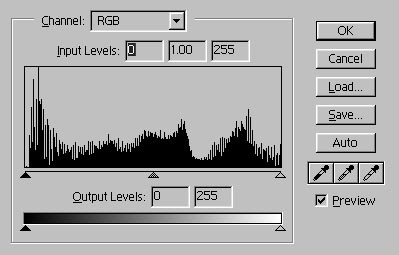
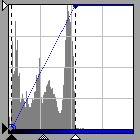
Comment: This is the preview image's histogram generated in Step 1. |
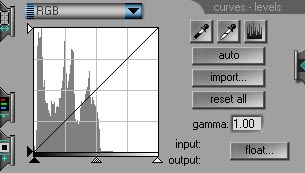
Clicking "auto" expands the histogram and sets the black- and white-points. Clicking the cont button on the main control panel has the same effect.
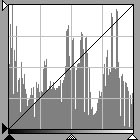 |
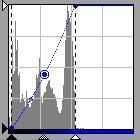
Comment: Using the auto feature sets the black and white points by setting the black and white points of the underlying 3 color channels, not the RGB. This was implemented starting on version 2.5. To reset the 3 underlying channels press ctrl (on the PC) and click reset on the RGB page. Setting the black and white points is implicitly a global contrast increase. If you examine the underlying color channel curves you will see the characteristic degenerate "S" curve, indicating a linear increase in contrast:
Since there has been no loss of data, this is acceptable. |
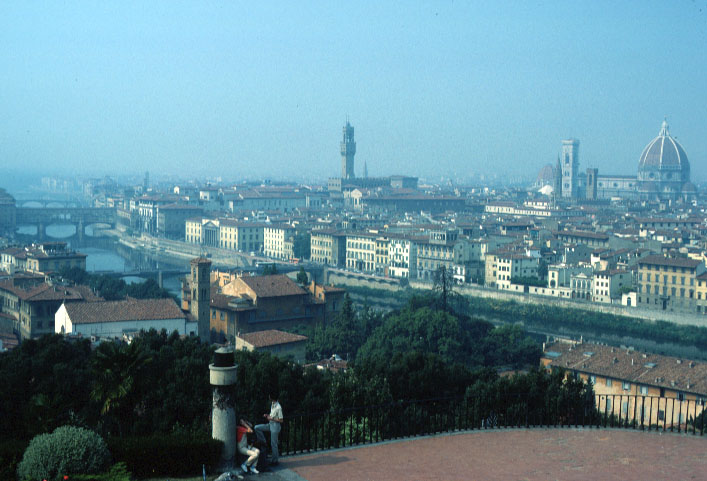
This is the scan corrected for tone:
Step 3. Correcting the blue cast
Now the point of the exercise: correcting Kodachrome's blue cast. Basically, this cannot be accomplished on the LS-2000 by using linear correction (e.g. the sliders). This must be achieved by modifying the blue gamma curve. Through the drop-down menu, display the blue gamma curve. Place the mouse cursor, the cross-hairs, approximately in the center of the curve:
Grab the curve and pull it down slightly:
Because NikonScan's gamma curves are somewhat tiny, manipulating them can be clumsy and finicky. (Version 2.5 of NikonScan enables a twice-as-large gamma curve display by floating the curves-level display and then enlarging the window. Amazingly, the programmer chose to display the box as a modal dialog box--you can't do anything outside of curve adjustment unless you first close the display. Nothing comes easy.) Another method of modifying the blue curve is to set the mid-tone gamma by moving the mid-tone (gray) marker or by entering the equivalent value in the edit box. In this case 0.75 was the appropriate value.

The final scan:
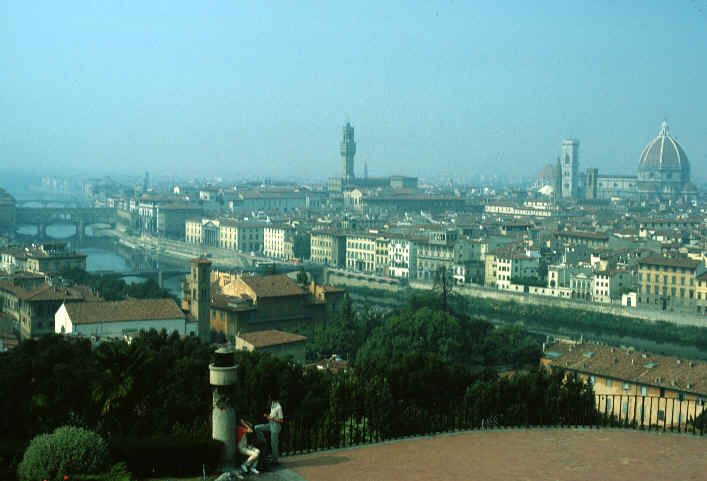
This method generates images of better than sufficient quality for use on the Web or good 8"x10" inkjet prints.
 |
Comment: Pressing the histogram button causes the histogram of the outputted image and the RGB, blue, red, and green curves to appear. |
This is the Photoshop histogram of the final scan.