Cleaning the Optics of the Nikon LS-8000/LS-9000 Film Scanner
First the caveats: if you choose to try cleaning your
Nikon LS-8000/LS-9000 film scanner, you do this at your own risk, and attempting this voids
the warranty. Also, if you’re squeamish
about cleaning a primary mirror or don't know what a primary mirror is, you
shouldn’t even think about trying this; send your unit to Nikon.
Cleaning Procedure
Perform the cleaning in a dust-free work area:
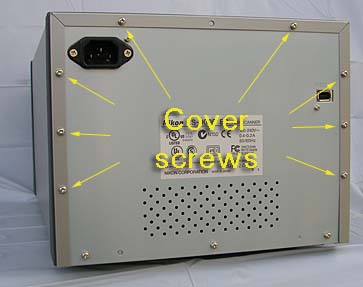
1. Remove cover (LS-8000: 8 screws at rear; LS-9000: 8 screws at rear plus 10 screws on bottom edges)
 |
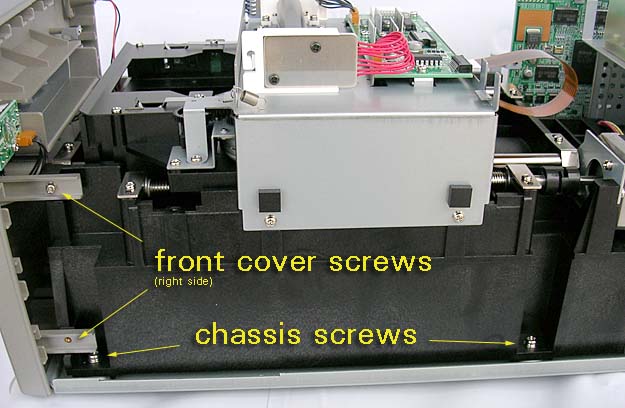
2. Remove front cover (4 screws, 2 on each side)
 |
3. Remove on-off button and extension rod (detach spring and while pushing the switch back angle the rod upwards to remove)
4. Detaching the scanner chassis:
The chassis is attached with 4 screws, 2 on each side at the bottom. After the screws are removed, carefully disconnect (avoid pulling the wires) the 5 electrical connectors at the left-rear side and a ribbon cable further back, attached to the focusing unit. Although it’s hard to get them confused because they're different, you should take note on where the connectors go.
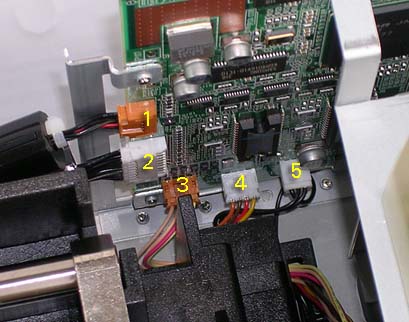 |
Connectors 1 to 5 |
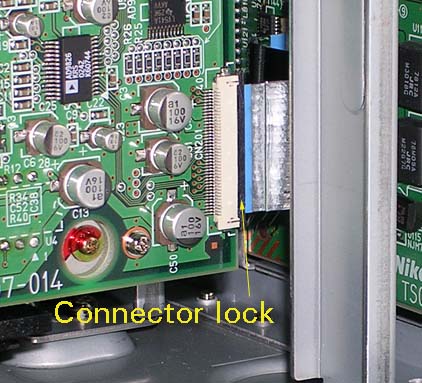 |
LS-9000 focusing mechanism. Release the ribbon cable by sliding the black connector lock to the right about 2mm. The rear cover plate was removed to access this connector |
Access to the optics is from the bottom of the chassis unit. You’ll also see a silver plate and a black access cover on the bottom. The silver plate seems to be a lock holding the lens in place. Don’t remove it. The black access plate covers the space between the rear of the lens and the sensors. Since this space appears to be dust-proof, I don’t recommend opening this either. (I've been told by others, however, that they found these elements on their scanners dirty.) It almost goes without saying the entire unit should be handled gently to avoid knocking the optics out of alignment, let alone damaging the stepper mechanism.
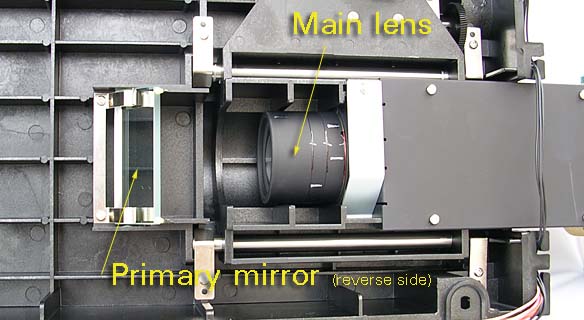 |
5. Cleaning:
There are 2 surfaces to clean: the mirror and the front of
the lens. You’re cleaning a primary mirror so you have to be extra
cautious. First blow-off the larger dust particles with air. Then
use high quality lens tissue wrapped around a cotton swab to clear any grime.
Brush the mirror with the lightest pressure.
You should do before and after scans of the same image(s), preferably of a high contrast film, such as a Kodachrome slide, which show flare. Otherwise you'll wonder whether this exercise was worth the effort. If your scanner has been reasonably well-cared for, don’t expect miracles.